A collection of vegan recipes using okara, the pulpy byproduct of the soymilk- and tofu-making process.
December 28, 2010
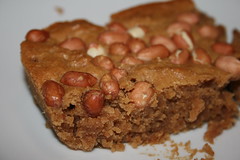
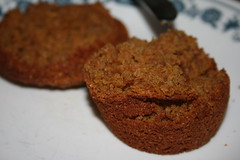
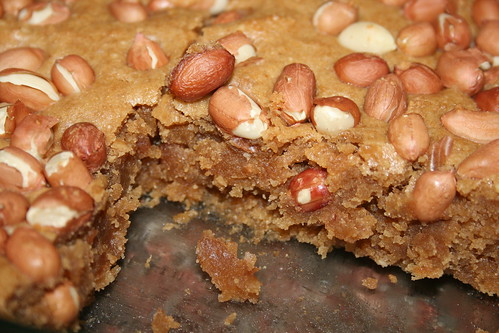
peanut butter cookie bars
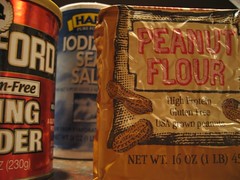
Peanut flour was an impulse buy, but I had no idea what to do with it. I was finally inspired to experiment with it.
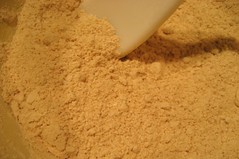
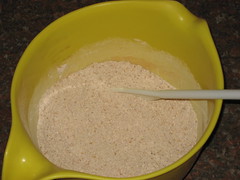
Stir the following ingredients in a bowl:
1/2 cup peanut flour
1/2 cup whole wheat pastry flour
1/2 tsp. salt
1/2 tsp. baking powder
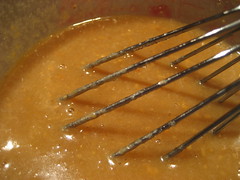
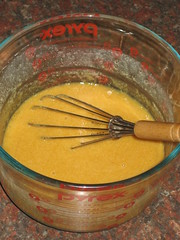
In a separate bowl, mix together
3/4 cup brown sugar (lightly packed)
1/4 cup sugar
1/4 cup peanut butter
1/2 cup okara
1/3 cup canola oil
1/4 cup soy milk
2 tsp. vanilla
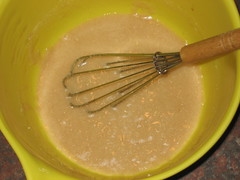
I used a whisk but an electric hand-held mixer might have been a better choice.
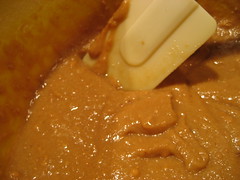
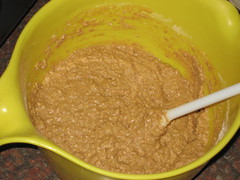
Thoroughly combine the wet ingredients with the dry ingredients.
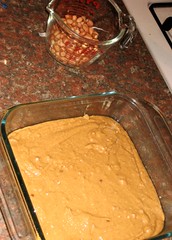
Lightly spray some vegetable oil onto an 8"x8" pan and pour the batter inside, spreading evenly.
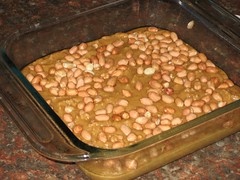
Evenly distribute
1/2 cup unsalted peanuts
over the surface and lightly press them down into the batter.
Bake at 350 degrees Fahrenheit for 25-35 minutes. (I'll narrow that cooking time down the next time I make these and edit this entry to reflect that.)
December 26, 2010
homemade vegan yogurt using soy milk and coconut milk
And now for something completely different. I figure that if you're the kind of person to make your own soy milk, you might also be the kind of person to make your own soy yogurt. In fact, if you're like me, you have the yogurt machine (which is really just an incubator that holds things at 110 degrees Fahrenheit) but are not sure what to do next.
I purchased my yogurt machine last year, but the instructions were completely dairy-centric and I found that dairy-to-soy substitutions (with a little sugar added to compensate for the absence of lactose) just didn't work. Internet searches for recipes were more or less fruitless. So I had to start from scratch. Now that I've finally perfected my recipe, I will post it here in the hopes that someone in the same position I was in last year will be able to find my formulation and save a lot of time.
You'll still have to tweak this recipe to get the yogurt to your liking. Adjust the sugar if it's too sweet or not sweet enough. Ferment it longer if it's not tart enough, or for less time if it's too tart. But I think you will find this to be a nice starter recipe.
Out-of-the-ordinary tools you will need to make your own yogurt:
a yogurt maker
a candy thermometer
First, shake a
13.5 oz. can of coconut milk
and open it, then pour the milk into a measuring cup. Add
2 1/4 cups unsweetened soy milk (cool or at room temperature)
to bring the total liquid to four cups.
NB: I use full-fat coconut milk, not lite. The brand I buy lists guar gum as an ingredient, which may or may not affect the yogurt's ability to thicken and set.
Pour most of the soy-coconut mixture into a pot, reserving 1/4 to 1/2 a cup. Add
1/4 cup corn starch
to the reserved liquid and whisk vigorously until the corn starch is dissolved.
Into the pot, stir
the corn starch/soy milk/coconut milk mixture
1/4 cup sugar
1/4 cup brown rice syrup
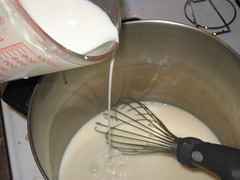
Over medium heat, whisk the contents of the pot more or less constantly, until the liquid is bubbling and has been thickened by the corn starch.
When the liquid is thickened, turn off the heat. Use the thermometer to monitor its temperature. When it reaches 110 degrees Fahrenheit, add
2 Tablespoons vanilla
5 Tablespoons vanilla soy yogurt
DO NOT add the yogurt when the temperature is above 110 degrees Fahrenheit!
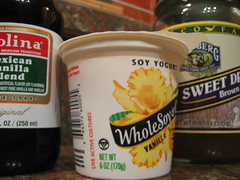
NB: I used to use Whole Soy vanilla, but have been boycotting them since I purchased some defective yogurt. It tasted overly sweet, barely tart at all, and sure enough did not work as a starter for my own yogurt, meaning that it didn't have live cultures in it. When I wrote to them asking if there were any known problems with that batch, I never received a reply. I was miffed, so since then I've been using other soy yogurts. Make sure that the brand you use contains "live cultures."
I have also found that different brands have different concentrations of live cultures, which means if you switch to a different brand you might have to adjust incubation time to achieve desired level of tartness. For instance, WholeSoy took about 10-12 hours to ferment, while Silk took about 14 hours.
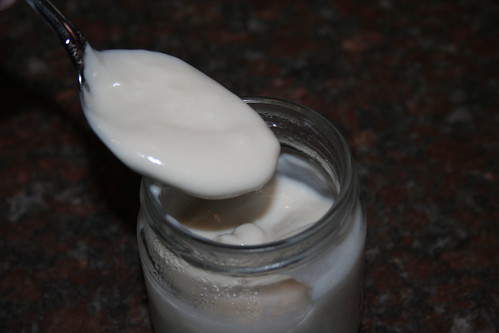
Using a whisk, incorporate the vanilla and store-bought soy yogurt thoroughly. Now comes the annoying part: pouring the yogurt into the jars. I use a funnel and a ladle. I try not to spill. It's annoying.
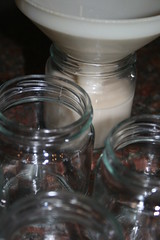
Pop the jars into the yogurt maker and set the timer for 10 hours. (The person I live with likes super-tart yogurt that has been left for 12 hours. So obviously this is part of the recipe that you'll need to tweak for yourself.) After the hours have elapsed, remove the jars from the machine, screw the lids on top, and refrigerate. If you find that the yogurt is not to your liking and you need to tweak the recipe, I suggest pouring the sub-par yogurt into a fruit smoothie. This is how I dealt with so many test batches of yogurt!
So what exactly is yogurt, anyway? Simply put, what you are doing here is taking some soy milk, throwing bacteria in it, and leaving it at 110 degrees Fahrenheit for hours on end, allowing the bacteria to proliferate. Appetizing, eh? Don't worry, these bacteria are beneficial. They come from the store-bought yogurt; you can also buy powdered yogurt starter, but many of these contain milk products. Use vegan soy yogurt as a starter if you want to make vegan yogurt.
Two important microorganisms that make up the yogurt are Streptococcus thermophilus and Lactobacillus delbrueckii bulgaricus, both of which produce lactic acid. When the yogurt is held at 110 degrees Fahrenheit, the conditions are ideal for bacteria to replicate, and that is what they do. S. thermophilus eats sugar and produces acid as a byproduct. So does L. d. bulgaricus, which also plays more of a role in the yogurt's flavor and aroma. Eventually, the lactic acid produced by the bacteria decreases the pH of the yogurt so much that other microorganisms are unable to survive. (So if you accidentally contaminate your yogurt with any other bacteria, it will probably be killed by the acidic environment. This is not an excuse to relax your kitchen-hygiene standards, however.)
Because soy milk and coconut milk don't contain lactose, you have to add sugar so the bacteria have food to eat. Additionally, the reason you must wait to add the store-bought yogurt until the temperature has dropped to 110 degrees Fahrenheit is because the bacteria will not be able to survive in temperatures that are much higher than that.
November 25, 2010
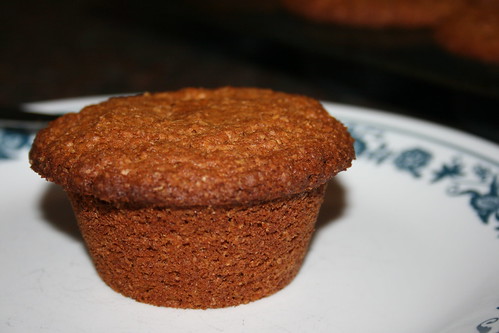
okara-bran muffins
Bran muffins are not usually the kind of thing that excites me in the least, but these muffins, with seasonal spices and a hint of pumpkin, are quite nice. I wonder if you could replace the pumpkin with additional okara for a straight-up bran muffin -- it seems like you could, but I haven't tried it to see how it would affect taste and texture. Maybe worth a little experimentation if you're ever in dire need of extra fiber.
In a bowl, combine
1 cup wheat bran (flakes)
1 1/2 cup whole-wheat pastry flour
2/3 cup sugar
1 Tablespoon baking powder
1 tsp. baking soda
1/2 tsp. salt
1 tsp. cinnamon
1 tsp. ground ginger
1/2 tsp. ground nutmeg
1/4 tsp. allspice
1/4 tsp. ground cloves
and stir until ingredients are well incorporated.
In a separate bowl, combine
1/2 cup canola oil
1/2 cup okara
1/2 cup pureed pumpkin
1/2 cup unsweetened soy milk
1 tsp. rice vinegar
2 Tablespoons maple syrup
1 tsp. vanilla
and whisk until ingredients are combined and oil is emulsified.
Pour the wet ingredients into the dry ingredients and stir until just mixed.
Fill the wells of a lightly oiled 12-muffin pan and bake at 400 degrees Fahrenheit for 27 minutes.
September 22, 2010
okara poundcake
Update: I have since come up with a different poundcake recipe, should you be interested in trying that one as well.
I am way behind in posting entries -- I have at least two more recipes to post, but limited Internet access combined with a busy schedule is holding me back! It's OK, before I know it I'll have a goodly chunk of free time. Until then, I present to you:
Preheat oven to 325 degrees Fahrenheit.
In a bowl, combine
2 cups whole-wheat pastry flour
3 Tablespoons corn starch
3 tsp. baking powder
1/2 tsp. baking soda
1/2 tsp. salt
and stir until thoroughly mixed.
In a small pot over low heat, melt
3.5 oz. dark or semi-sweet chocolate
1 cup sugar
in
3/4 cup soy milk
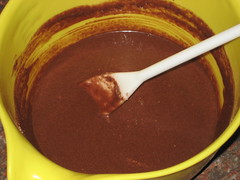
Stir until chocolate is melted and well combined. Turn off heat and whisk in
1/2 cup canola oil
until it is emulsified. Stir in
5 oz. vanilla soy yogurt
1/2 cup okara
2 1/2 tsp. vanilla extract
NB: The chocolate I used was Green & Black's Organic Dark Chocolate, which according to the label was "infused with spices and a twist of orange." My pound cake did not come out super-chocolately, but it did have a really delightful spiciness to it!
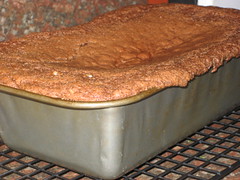
Pour the chocolate mixture into the dry ingredients and stir until incorporated. Pour batter into an oiled 9"x5" bread pan and bake at 325 degrees Fahrenheit for 65 minutes.
Why can't I have pretty things?
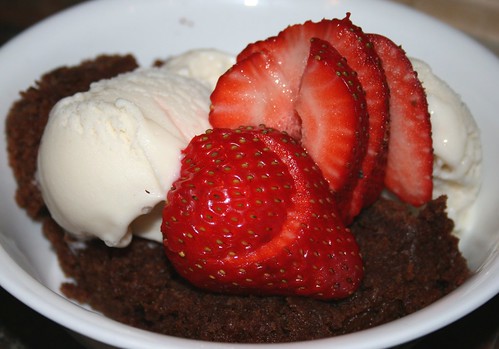
Verdict: As you can see, my cake collapsed a bit, but that seems to be my lot in life. After cutting away the overflowed edges, I was able to successfully turn it out and slice off some pieces. It was super crumbly at first, but after it had cooled off completely it held together pretty well. Maybe not quite as dense as I'd want a pound cake to be, but it tasted great. Not super-chocolately as previously mentioned, but it sure was fantastic with some strawberries and vanilla soy ice cream.
September 1, 2010
fried okara spring rolls
Update: A newer version of this recipe is available here.
Spray a pan with vegetable oil and saute
1/2 cup okara
1 Tablespoon sugar
1 Tablespoon agave nectar
1 Tablespoon tamari
2 Tablespoons rice vinegar
1 carrot, shredded
1/2 tsp. minced ginger
1/4 tsp. salt
and saute over medium heat for a few minutes, until the liquids have been mostly evaporated and the contents have been thoroughly combined.
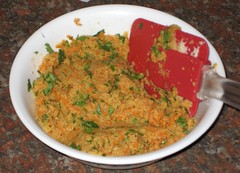
Move okara-carrot mixture to a bowl and stir in
2 Tablespoons finely chopped cilantro
Soak a
spring roll wrapper
in some warm water, just long enough to soften it. If you haven't worked with spring roll wrappers before, be advised that it might take some getting used to. They can be sticky and tear easily, which can be pretty frustrating.
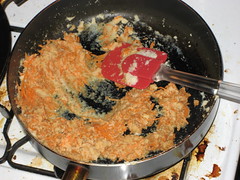
Above: You can see that I didn't clean the pan after cooking the okara mixture in it. It really wasn't necessary!
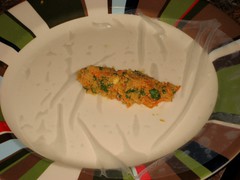
Put a heaping Tablespoonful of the okara mixture into the center of the spring roll wrapper.
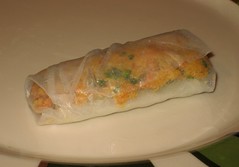
Fold the spring roll wrapper around the okara mixture, as if you were folding a burrito. Fold one side over, then fold the bottom up toward the center of the wrapper. Then fold the top down toward the center of the wrapper, and then take the center part with the okara mixture and roll it toward the other side.
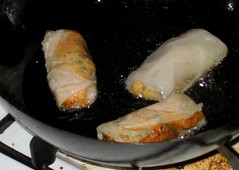
Repeat these steps -- soaking a spring roll wrapper, putting down a Tablespoon of filling, and folding the wrapper -- until you run out of the okara mixture. I was able to make seven spring rolls with this recipe.
Fry the spring rolls in hot
oil
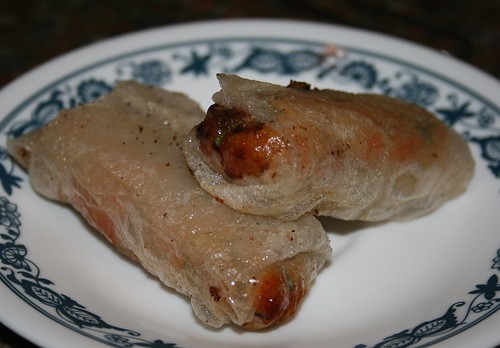
I used canola oil but something like sesame oil might be more appropriate for a dish like this. After a few minutes, turn the rolls over and fry on the other side for a few minutes. They might turn a little golden, but spring roll wrappers seem to stay pretty light in color ... Unless you fried it for a really long time, I guess. It wasn't necessary to fry these for very long.
Remove from oil and drain. I drained them on a paper towel, to which a few of the spring rolls stuck, so maybe it'd be a better idea to drain them on a wire rack.
Verdict: I really liked the way these tasted! I didn't even use a dipping sauce. The spring-roll wrappers, however, were a little on the sticky/chewy side, so these probably would be even better with wonton wrappers. I can't find ready-made wonton wrappers that are eggless, however, and they are kind of a pain to make by hand. But if you would like to make your own wonton wrappers, or if you can find appropriate wonton wrappers at the store, you might like to use those instead. I would probably consider this to be one of my best okara recipes if I used wonton wrappers instead of spring-roll wrappers.
This recipe only made seven spring rolls -- since I was just experimenting, I didn't want to make a whole bunch in case the experiment ended in failure. If you want more than seven, feel free to double, triple, etc., the recipe.
August 25, 2010
chickpea sandwich filling
Drain the contents of
one 15-oz. can chickpeas (garbanzo beans)
and mash them in a bowl with a fork, potato masher, or other mashing implement.
To this bowl, add
1/2 cup okara
one carrot, grated (about 2.5 oz.)
1 scallion, sliced
half bell pepper, diced (about 2 oz.) or one celery rib, sliced
3 Tablespoons vegan mayonnaise
2 tsp. relish
2 tsp. yellow mustard
salt, to taste
and mix contents thoroughly.
You can eat this as a salad, on bread, or inside of a pita pocket, as pictured above. This made five pita sandwiches for me (half a piece of pita bread per sandwich) -- your mileage could vary depending on how much filling you put in each pita pocket.
August 22, 2010
oatmeal-chocolate chip cookies
Update: I came up with a different oatmeal/okara cookie recipe that I think is much better than this one.
In a bowl, mix together
1 1/2 cups whole-wheat pastry flour
1 cup chocolate chips
1 cup chopped walnuts
3/4 quick-cooking oats
1/2 tsp. salt
3/4 tsp. baking soda
1 1/2 tsp. espresso powder
and mix until well incorporated.
In another bowl, whisk together
2/3 cup canola oil
2/3 cup maple syrup
1 tsp. vanilla
1/2 cup okara
and emulsify.
Add wet ingredients to dry ingredients and stir together thoroughly. The dough will seem sticky and wet. Refrigerate cookie dough for 15 minutes -- this will allow the oats to absorb some of the liquid, resulting in a firmer dough.
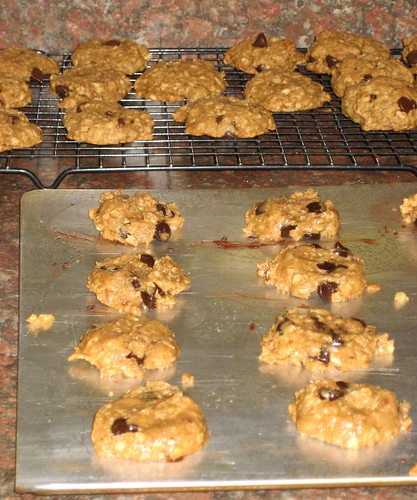
Drop cookies onto a lightly oiled cookie sheet by the Tablespoonful. Flatten down with a fork or your finger tips.
Bake for 350 degrees Fahrenheit for 13 minutes. Let cool off on pan for a few minutes before transferring cookies to a wire cooling rack. This recipe makes about three dozen cookies.
Verdict: I really liked the flavor of these cookies. The espresso powder gave it a nice dimension, but I might not have noticed its flavor if I didn't know it was there. If you want something that is more overtly coffee-flavored you'll probably want to increase the amount of espresso powder. Although I liked the flavor, I thought the cookies were a little bready. They didn't quite have that cookie feel.
August 12, 2010
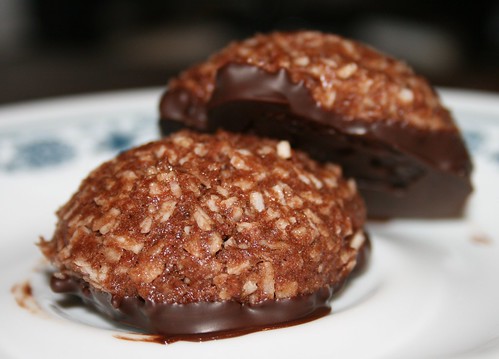
double-chocolate macaroons
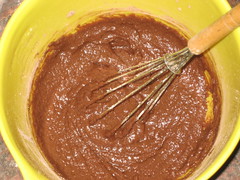
Whisk together
1/2 cup okara
1/3 cup canola oil
1/2 cup sugar
1 tsp. vanilla
1/2 tsp. almond extract
1/2 tsp. coconut extract
Add
1/2 cup all-purpose flour
1/4 cup cocoa powder
1 tsp. baking powder
1/4 tsp. salt
and whisk until ingredients are well incorporated.
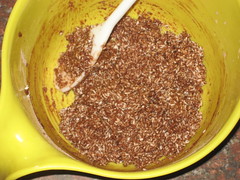
With a spoon, stir in
1 1/2 cups shredded unsweetened coconut
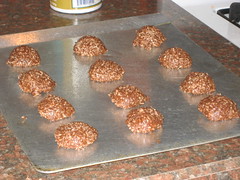
Spray a cookie sheet with vegetable spray and drop cookie dough onto it by the Tablespoonful. Don't press the cookies down; leave them rounded.
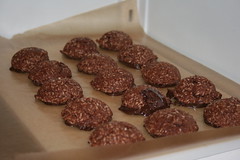
Bake cookies for 14 minutes at 350 degrees Fahrenheit. Allow to cool for five minutes before transferring to a rack to cool completely.
When cookies are cool, melt
3/4 cup chocolate chips
over low heat.
Dip the bottom of the cookies into the melted chocolate, twisting around to ensure they are covered. Place onto a piece of wax paper or parchment paper on top of a plate or cutting board. Chill the chocolate-dipped cookies in the refrigerator until the chocolate has hardened. I left the room for 50 minutes, and when I came back they were ready -- but they could have been done before that.
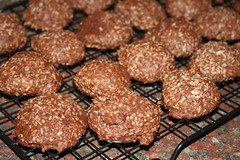
If you're like me and you have a busted air conditioner, these might melt between your fingertips immediately after removing them from the fridge. But if you're one of the lucky people whose house isn't 85 degrees at 2 o'clock in the morning, these probably won't be quite as messy. Nevertheless, it probably goes without saying that these should be stored in an airtight container in the fridge, especially during summertime.
August 4, 2010
chocolate-cherry okara cake
I love chocolate and fruit combinations, and chocolate-cherry is underutilized if you ask me. Here we have a low-fat and moist tube cake with hints of cherry that you could probably amplify by garnishing with fresh cherries. This recipe is adapted from the chocolate cupcake recipe in Bryanna Clark Grogan's The (Almost) No Fat Cookbook -- which means that you could probably adapt this back to cupcake format for chocolate okara cupcakes, if you're one of those people. Cooking time would probably have to be reduced to 20-25 minutes for cupcakes, but I haven't tested that out personally.
In a bowl, combine
1 1/4 cups all-purpose flour
1 tsp. baking soda
1 tsp. baking powder
1/2 tsp. salt
and stir until ingredients are incorporated.
In another bowl, mix
8 oz. okara
1 cup sugar
1/2 cup cocoa powder
1/2 cup cherry juice
1 Tablespoon rice vinegar
1 Tablespoon vanilla
and stir until there are no lumps.
Place the flour mixture into the wet ingredients and stir until just combined.
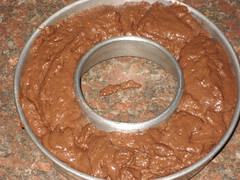
Scrape all of the batter into a lightly oiled 8-inch tube pan and spread evenly.
Bake at 325 degrees Fahrenheit for 45 minutes. Cool on a rack.
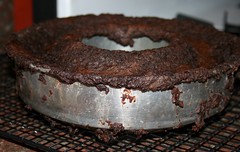
Warning: When I cook this, the batter usually overflows the pan a bit during baking. Put something underneath the pan that will protect your oven, but try not to impede air flow especially if using a convection setting.
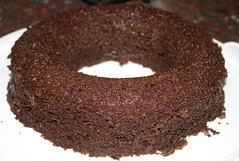
Above: A very ugly cake! Don't worry, it looks nicer when it's removed from the pan.
Remove cake from pan, turning it onto a flat surface (like the bottom of a cake holder). I had to cut away parts of the cake that had flowed over the edge of the pan, and then I carefully ran a knife around the edges. After doing that, it fell from the pan pretty easily.
At this point, let the cake cool while you make a ganache frosting.
Over low heat, melt
1 cup chocolate chips
1/4 cup cherry juice
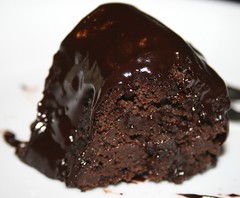
and stir until lumps have disappeared and the mixture is smooth and shiny. Pour over the cake very carefully, allowing it to drip down the sides. You'll probably have more than enough frosting -- use the leftovers to dip fruit in! Yum.
Allow the frosting to cool (in the fridge if desired), then cut into pieces and enjoy.
August 3, 2010
blueberry-okara muffins
Update: I've since come up with a newer okara blueberry muffin recipe that I think is much better than this one. Check it out!
Half a pound of okara and a dash of corn meal -- these muffins are a pretty good complement to the rest of your breakfast. My favorite blueberry muffin recipe is still the one in Vegan With a Vengeance (I even aped the inclusion of corn meal in my own recipe), but when I have a pile of okara to use up, this will do fine.
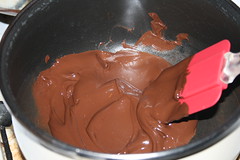
In a small bowl, combine
1 1/4 cup whole-wheat pastry flour
1/3 cup corn meal (finely ground)
1 tsp. baking powder
1 tsp. baking soda
1/2 tsp. salt
In a larger bowl, combine
8 oz. okara
1/3 cup sugar
1/2 cup soy milk
1 Tablespoon rice vinegar
1 tsp. vanilla
and stir thoroughly.
Add most of the flour mixture from the first bowl, reserving about 1/4 cup. Combine the flour mixture with the wet ingredients.
Put
1 cup blueberries
into the first bowl with the reserved flour mixture and combine until the berries are coated in flour.
Note: I like to use frozen wild blueberries, which are smaller than most blueberries sold in grocery stores and thus ideal for muffins. I buy mine from Trader Joe's.
Put the flour-coated blueberries and the rest of the flour mixture into the bowl with the rest of the wet ingredients. Combine until just mixed.
Fill the cups of a lightly oiled 12-muffin tin with the batter. Bake at 350 degrees Fahrenheit for 20 minutes.